SPOILER WARNING
Every escape room article is spoiler-free to assist first-time players, but do not click any links on the article if you wish to avoid spoilers. Spoilers are also hidden in optional toggles.
- "'All persons wishing to exit the facility must do so through this pressure exchange chamber. Once the chamber has been sealed, the pressure can be lowered to match the surrounding environment'."
- — Clover, reading the manual found in the PEC
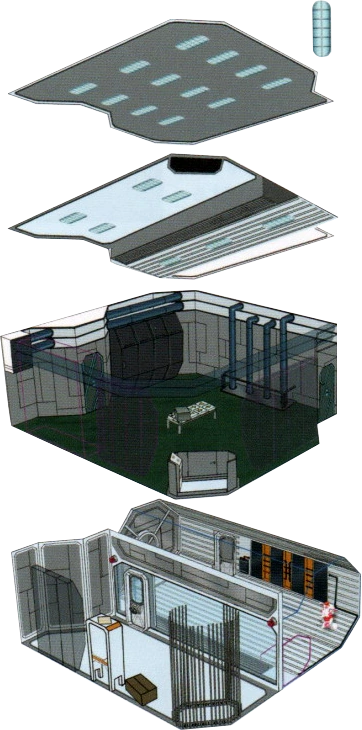
The Pressure Exchange Chamber, or PEC for short, is an escape room behind the blue Chromatic Door on Floor B. Sigma, Clover, and Tenmyouji go through this room on Tenmyouji's route.
Layout[]

Concept art.
The Pressure Exchange Chamber is made up of two rooms, one on the upper level and one on the lower.
The upper level is the preparation room, where a person prepares to enter the PEC. The upper chamber has a group of lockers that contain hazmat suits that are needed to access the pressure exchange chamber, a couple of benches, and a stool with a scanner.
The lower level is the actual exchange chamber. It has a barred exit door, as well as a Zero III inflatable doll.
Story[]
Sigma heads to the PEC with Clover and Tenmyouji on Tenmyouji's route. Once arriving in the room, Clover finds a PEC manual. It explains that the pressure inside the facility is higher than the pressure outside, in order to keep airborne viral contagions out of the facility (Radical-6). The manual mentions that the room has hazmat suits that are supposed to be used in the PEC room.
They head down the small elevator and find the PEC. Tenmyouji says it is impossible for there to be an easy exit and that the only way out is the Number 9 door. They put on the hazmat suits and head into the PEC. They discover an exit door, but it is sealed shut. This makes Clover run out of the room in disgust and the pressure in the chamber begins to increase. Sigma and Tenmyouji are able to lower the pressure and get out thanks to Clover, who found a manual on how to exit the chamber nearby.
The trio then removes the hazmat suits and finishes solving the puzzles. Inside the safe is a map of Floor B, two moon cards, a memory card, and the exit key. Tenmyouji says that the memory card looks familiar, but doesn't explain anything. Sigma and Clover take one moon card, while Tenmyouji takes the other. After leaving the PEC, they head to Warehouse B.
Items[]
Found Items[]
Tablet[]
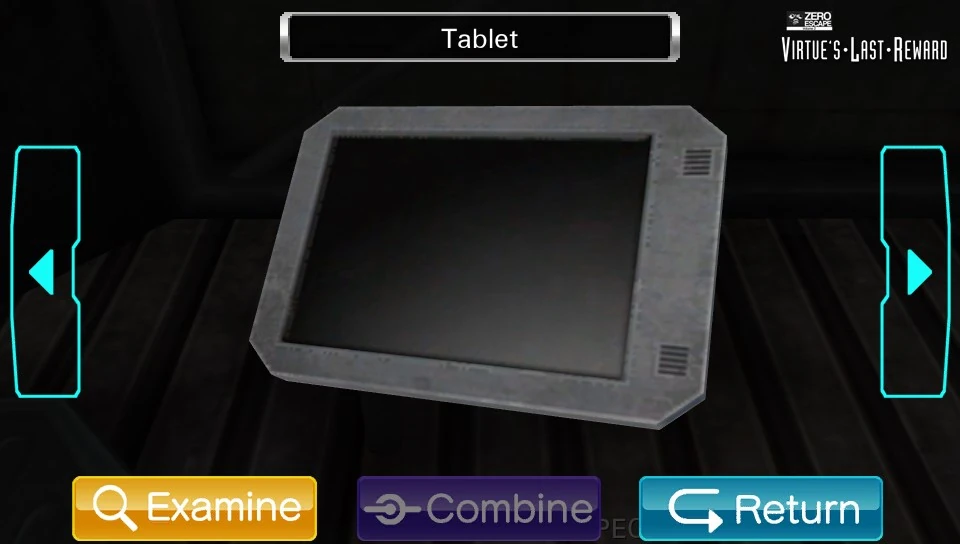
A tablet powered by unrechargable batteries? Obsolete...
The tablet is found within the exchange chamber downstairs, laying on the bench. It can be connected to the USB cable on the machine upstairs to scan the Zero Jr. doll.
Zero Jr. Doll[]
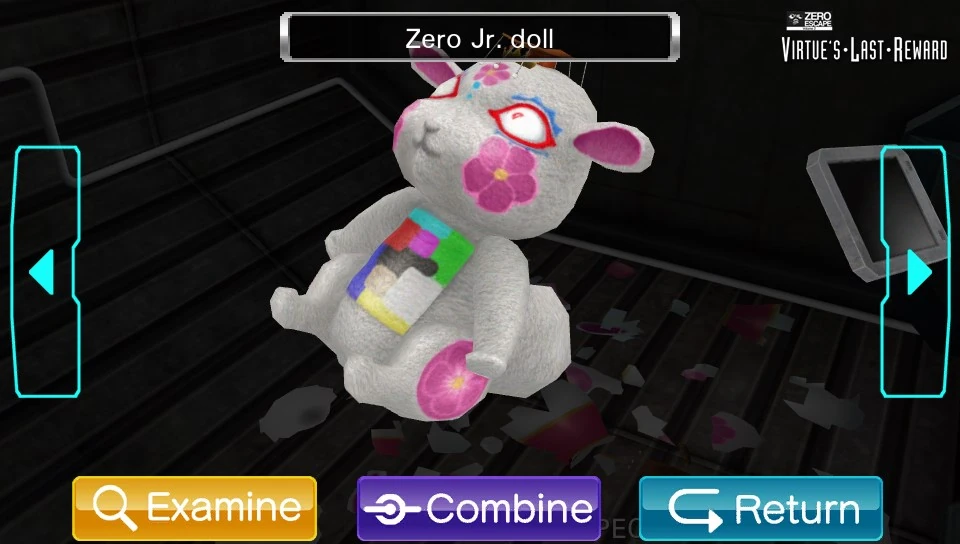

Just wanna squeeze it till it pops...
The doll is found inside of the other Zero Jr. replica in the exchange chamber. It can be obtained after the room decompresses and the replica is popped.
Combines with small protective suit to form Zero Jr. in suit
Small Key (x2)[]

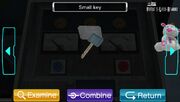
Simple keys.
One of the small keys is found on the pressure control panel in the exchange chamber. The other key is found behind the glass case on the elevator. They are used to unlock the rightmost and middle lockers outside of the exchange chamber.
Laser Emitter (Yellow) (x2)[]

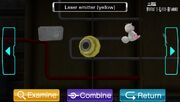
Yellow lasers.
The yellow laser emitters are found inside of the power plates on the wall of the exchange chamber. The plates can be removed after the Zero Jr. replica explodes. They can be placed on the yellow cable fittings to redirect the current from the power box to the control panel, during the laser power grid minigame.
Laser Emitter (Purple) (x2)[]

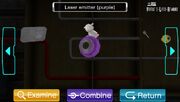
Purple lasers.
The purple laser emitters are found inside of the power plates on the wall of the exchange chamber. The plates can be removed after the Zero Jr. replica explodes. They can be placed on the purple cable fittings to redirect the current from the power box to the control panel during the laser power grid minigame.
Small Protective Suit[]
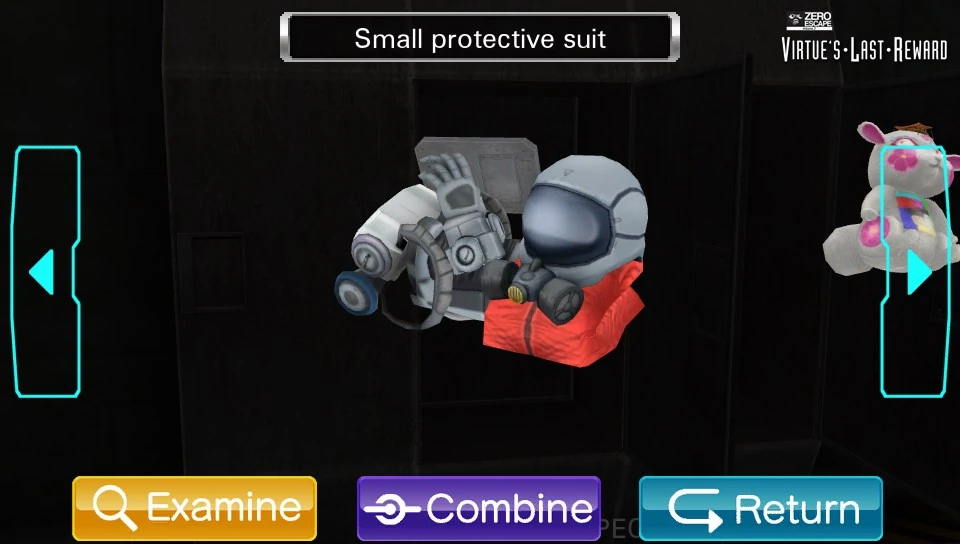
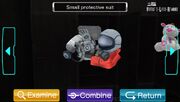
For the midgets.
This suit is found in the middle locker outside of the exchange chamber.
Combines with Zero Jr. doll to form Zero Jr. in suit
Combined Items[]
Zero Jr. In Suit[]


The Zero Jr. in suit is found after the Zero Jr. doll and the small protective suit are combined. It can be placed on the chair upstairs to be scanned by the machine.
Minigames[]
Connect The Dots[]


This minigame is played twice in the PEC, once to enter the Pressure Exchange Chamber and once to exit it. To complete these puzzles, the player must connect the dots on the locking device matching the dotted notes to complete the minigame both times. One note is found in the PEC manual, while Clover finds a binder that contains the second note under a barometer.
")
.jpg "Zero Escape Vol. 2 Virtue's Last Reward 1 (11).jpg (115 KB)")
Laser Power Grid[]

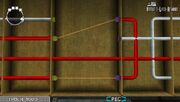
Placement of the emitters.
Tap a metal plate on the wall next to the white cables. Take the yellow and purple laser emitters (there are two of each color).
On the left side, use the yellow emitters on the bottom and middle yellow cable ends. On the right side, put the purple emitters on the top and bottom purple cable ends. This powers up the console, allowing Sigma to change the pressure of the room and be able to exit the room.
Shape Combination Lock[]

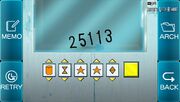
The combination to the lock.
In this minigame, the player must use the numbers at the bottom of the device and convert them to certain symbols. The key to convert these symbols is found on the benches in the locker room and the Pressure Exchange Chamber. The correct sequence that equals 25113 is cylinder, hourglass, star, star, and diamond.
Digital Number Colors[]


This minigame is activated after the Zero Jr. doll in the suit is placed on the chair and the tablet has been plugged in with the USB cable. The player must enter a three-digit passcode into the machine. There are two sequences of colors that are found throughout the rooms that lead to these two passcodes. Using the digital '8' in the minigame, you can translate the color sequences to numbers.
The escape password can be found using the paper with colorful picture found in the rightmost locker on the lower floor. Using the code:
- cyan + red + blue + yellow + pink + black = 6
- cyan + green + black + blue + yellow = 2
- cyan + green + black + pink + yellow = 3
...the passcode is found to be 623.
The file password can be found using the code on the side of the machine itself. Using the code:
- green + pink = 1
- green + pink = 1
- green + pink + cyan = 7
...the passcode is found to be 117.
.jpg "Zero Escape Vol. 2 Virtue's Last Reward 1 (12).jpg (92 KB)")
Trivia[]
- In the 3DS version, there is a fatal game-breaking glitch in the PEC: If the player saves during the PEC escape section, there is a high chance that their game will freeze and their save data will get corrupted, forcing them to delete their data and start the entire game over. This glitch occurs less in the 3DS eShop version of the game, and is far less fatal. An update to the game disabled saving in this particular room entirely. The same glitch occurs under the same circumstances in the Crew Quarters.
- In the Q & A, Uchikoshi claims that his favorite moment in the game occurred during the escape section of this room, when Sigma sniffs "Clover's" protective gear.
- Tenmyouji and Clover attempt to spell "pipe" in this room, but they are cut off by Sigma. This is a reference to the "pipe joke" in the Study in 999.
- Clover being directed to interact with objects by the character being controlled by the player is reminiscent of the Laboratory in 999. However, in the PEC, the player is the one that becomes trapped, rather than Clover.
| SPOILER WARNING - DON'T READ UNTIL YOU COMPLETE ENTIRE GAME | |
| |
Humorous Quotes[]
- Examine the Zero Jr. replica after decompression.
 Sigma: Gah! It got big! Tenmyouji: Must be the difference in pressure. Tenmyouji: You ever taken an unopened bag of chips to the top of a mountain or something and it gets all puffed up like it's gonna pop? Tenmyouji: Same sorta thing. Sigma: I guess, but this is just... Tenmyouji: Looks like it might be about to pop.
- Sigma: I wonder if... Sigma: ... ... Sigma: *Poke*
(BOOM) Sigma: ! Tenmyouji: ! Sigma: It popped! Tenmyouji: Don't worry. I think that was the point. Tenmyouji: See? There was something inside.
- Come upstairs after escaping from decompression chamber.
- Sigma: Can we take these off now? Clover: Yeah, I think so. Clover: I mean, we unlocked the door to the decompression chamber, right? Tenmyouji: Yeah. No point in keeping the damn things on now. Tenmyouji: Off they go. Clover: Aaaaah...Feels much better. Sigma: Clover, you're drenched in sweat. Clover: Hey! You're not thinking...creepy stuff, are you? Sigma: Of course not! Tenmyouji: Just put them back in the locker. Clover: Okay! Clover: You better not, like, smell mine or something, Sigma! Sigma: I'm offended you would even suggest such a thing!
- Examine one of the lockers near the entrance after removing the suits.
- Sigma: Th-This is Clover's suit...! Sigma: Maybe just...just once. Who would it hurt...? Sigma: No! You idiot! What are you thinking?! Sigma: This isn't the time for that! Sigma: But...just a little... Sigma: *Sniff* *Sniff* *Sniff* *Sniff* Sigma: Aaaahhh...Clover's smell... Sigma: Wait...why does she smell like...old people and booze...? Sigma: *Sniff* *Sniff* *Sniff* *Sniff*
(SMACK) Clover: Hey! What are you doing, you creep!? Tenmyouji: Uh, Sigma...that's...That's my suit. Sigma: O-Oh my God...
- Obtain the safe password.
- Clover: Good job! You deserve a pat on the back! Sigma: Don't patronize me! Tenmyouji: Hey, the color's changed. Clover: You're right...
- Examine the four pipes along the wall a few times on "EASY" mode.
- Clover: Give me a "P"! Tenmyouji: Give me an "I"! Sigma: What is wrong with you?!