SPOILER WARNING
Every escape room article is spoiler-free to assist first-time players, but do not click any links on the article if you wish to avoid spoilers. Spoilers are also hidden in optional toggles.
- "A captain. Does that mean this man was Zero? On his left hand was a bracelet. The number on the bracelet was 0..."
- — Junpei, after walking in on the dead captain
The Captain's Quarters is a small escape room entered immediately after going through the Chart room, which is past Door 1. It has two rooms, one of which is the communications office, and the other is the actual quarters. It is investigated by Junpei, Ace and Clover.
Layout[]
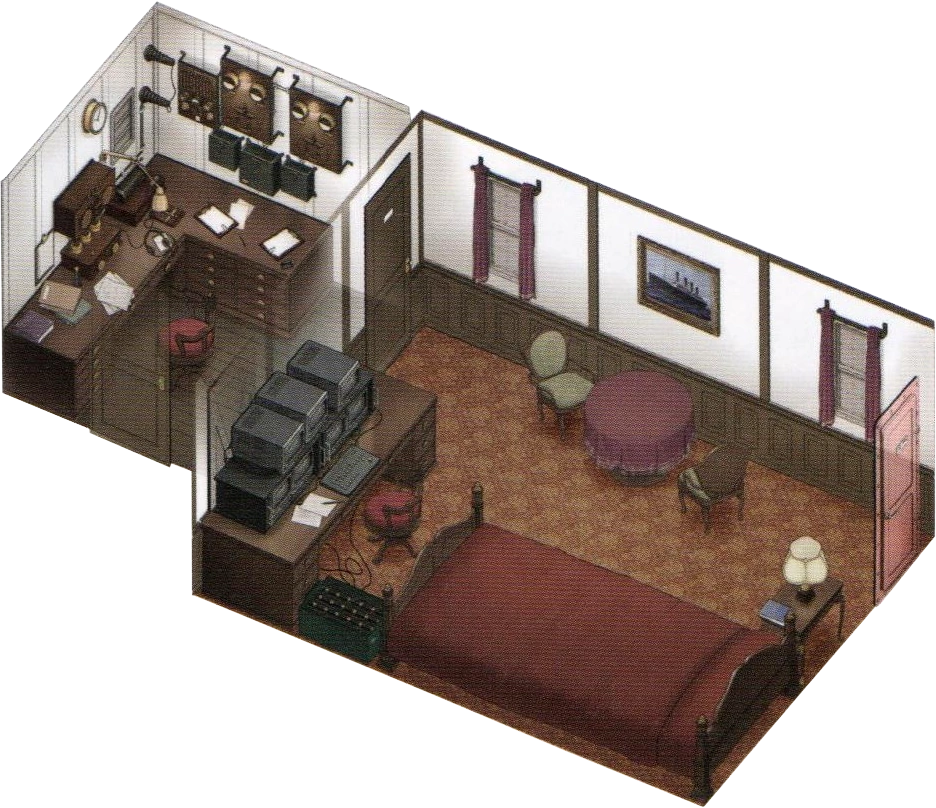
The office on the left and quarters on the right.
The Captain's Quarters is split into two small rooms: The communications office and the actual quarters. The communications office is entered first, and the Captain's Quarters can be accessed beyond it.
Communications Office[]
The communications office has a bunch of retro electronic equipment that were used on ships to communicate with each other out at sea. One object of interest is a telegraph key, used to send messages through Morse code. Other objects scattered on the table include a small box of screwdrivers and a long wire.
Captain's Quarters[]
A door on the right side of the communications office leads to the actual quarters. The dead body of the apparent captain of the ship is in the room, along with a camcorder, monitors showing different areas of the ship, and a bed with a nightstand next to it. There is also a green chair that has a blood stain on the cushion.
Story[]
Could he be Zero?
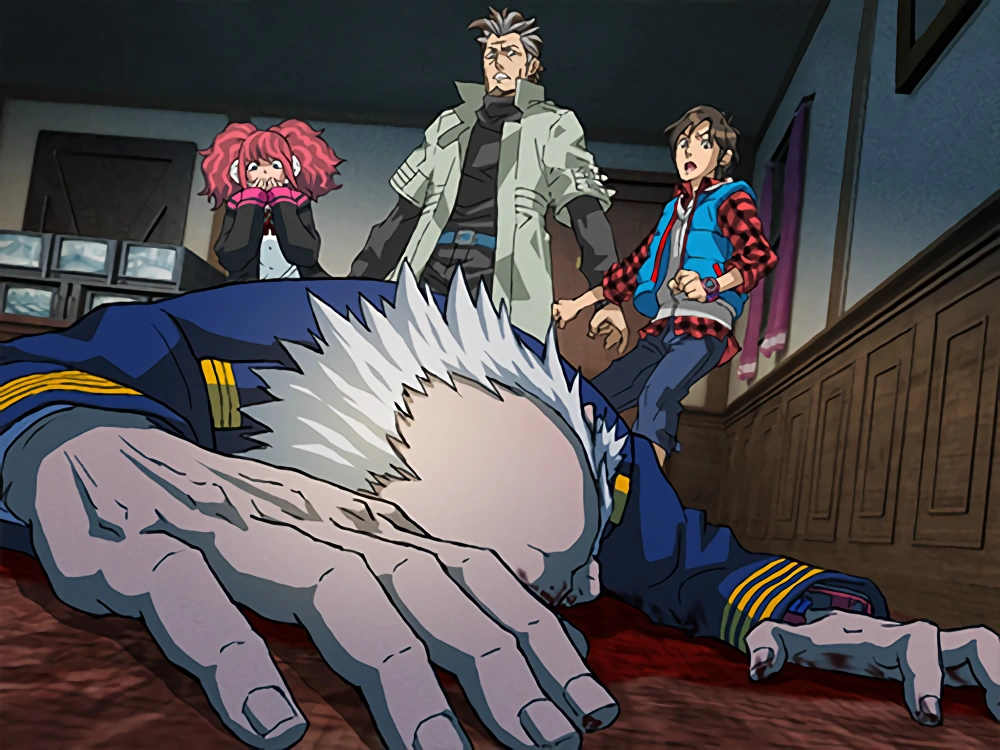
Upon leaving the wheelhouse, Junpei, Clover, and Ace enter a narrow hallway and open a door. They walk into what appears to be a communications office. Another door connected to the room has a plaque that says Captain's Quarters on it. The group suspects that it is Zero's hideout, and everyone is nervous except for Clover, saying that they have nothing to lose. They walk in to a dead man dressed like a captain. He appeared to have been killed with an axe, as it was sitting right next to him, and he was wearing a bracelet with a zero on the face of it. Junpei comes to the conclusion that the dead man is not the real Zero, as the evidence is too straightforward. Ace leaves to investigate the communications office, leaving Junpei and Clover alone with the dead man.
Monitor[]
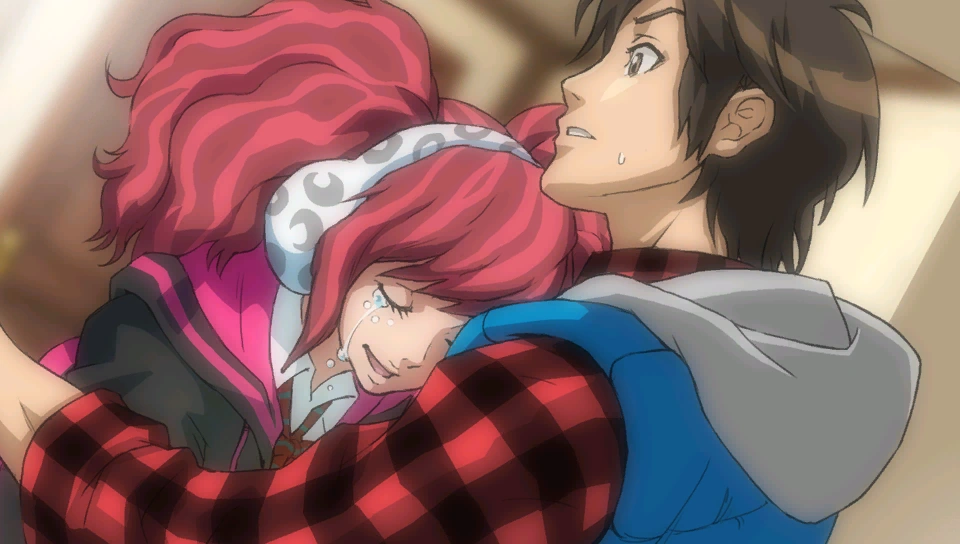
Clover hugs Junpei after realizing Snake is not dead.
Triggered by pressing the keyboard in front of the monitors. (True Ending route only)
When Junpei presses on the keyboard connected to the monitors in the quarters, the bottom four screens change into the letters "Z", "E", "R", and "O". Junpei laughs at Zero's idea of a joke and asks Clover if she thinks the dead man is Zero. She says no, and is firm on her belief that one of the players is Zero. Junpei is convinced that the obviousness of the man being Zero is just a trick to mock them. Clover and Junpei proceed to examine the man's body. His bracelet falls off and Junpei comments that the man had a less painful death than Snake. He says that some of his bones were sticking out of his left arm and Clover stops him to ask if he was for sure that the left arm was broken. After Junpei confirms the fact, she starts tearing up and tells Junpei that the body in the shower room is not Snake's. She hugs Junpei and thanks him for giving her the bookmark.
Junpei tells Clover that she should really be thanking Santa for the "leaf words". Clover says that Santa was a subject on the Gigantic and that he was unrecognizable due to Snake's blindness. She explains that there was an experiment in 2018 that was testing the use of the morphogenetic field and that it was called the Nonary Game. The game put the 18 participants (9 on the Gigantic and 9 in Nevada) in a life-or-death situation to make it easier for them to transfer information through the morphogenetic field. She mentions that she and Snake were a part of this experiment and that Snake was on the Gigantic, while she was in Building Q. She then recalls that one girl died, but Ace bursts into the room before she can tell Junpei her name. Ace asks for Junpei's help in the communications office and Junpei reluctantly leaves, mentioning that she should tell him the story later.
A Creepy Smile...[]
Triggered by pressing the keyboard in front of the monitors. (Axe Ending route only)
If Junpei did not give the four leaf clover bookmark to Clover, Junpei points out that the dead man in the room is not Zero. Clover says that one of them is actually their kidnapper and that they need to find a way out first before finding out the identity of the corpse. While walking away, he sees Clover smile angrily, but thinks his mind is playing tricks on him.
Red File[]

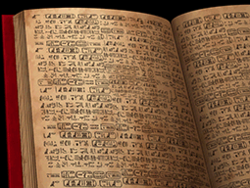
The ALL-ICE file, completely written in hieroglyphics.
Triggered by obtaining ALL-ICE file.
When Junpei obtains the ALL-ICE file, he looks through it hoping to find information, but neither he nor Ace can read it, as it's written in hieroglyphics. A key card drops out of the file, and it reads "BOTTOM DECK LIBRARY" on it. This turns out to be the Uranus key card used later to access the library. Junpei suddenly realizes that that could be where Alice is kept and tells Ace everything he knows about her history regarding Ice-9 and Gordain (This only occurs if you heard Seven talk about All-ice in the operating room).
Ace thinks for a bit and asks Junpei if he knows anything about CAS. Apparently, it's where the body is frozen using magnetic fields, leaving no time for ice crystals to form, safely preserving the frozen object. Ace suggests that Alice might have been frozen by CAS, and that she is still alive. Even more bizarre, he goes on to say that Alice might have been the dead captain's murderer, as there was no way anyone had access to Door 1 before their group and that Alice would know all of the secret passages on the ship. He then remembers what Seven told him about Gordain's message. Junpei then realizes the Uranus Key Card will give him the answers about Alice.
If the Axe Ending path is followed, Ace only comments on the All-ice file, and doesn't talk about CAS.
Items[]
Found Items[]
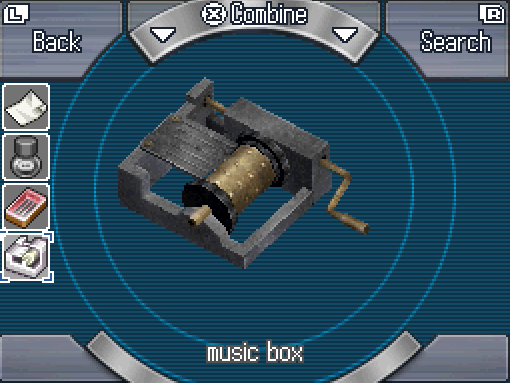
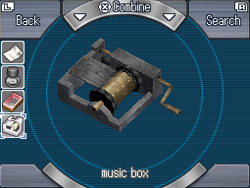
Music Box  []
[]
An antique music box.
An old music box that is found on the nightstand next to the bed in the Captain's Quarters. Contains a cylinder inside.
Combines with small screwdrivers to form: cylinder
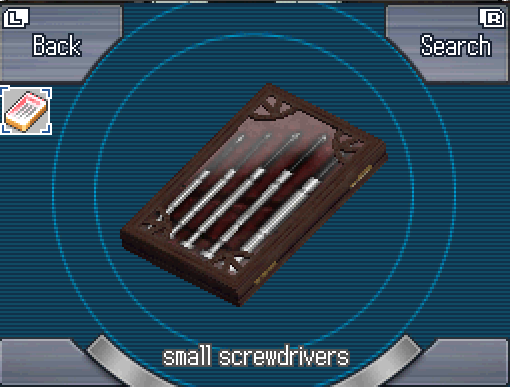
Small Screwdrivers []

An assortment of screwdrivers in a fancy case.
A set of screwdrivers sitting on a desk in the communications office. There are 5 different sizes of them and they come in a book-like case. Unscrews music box to get cylinder out.
Combines with music box to form: cylinder
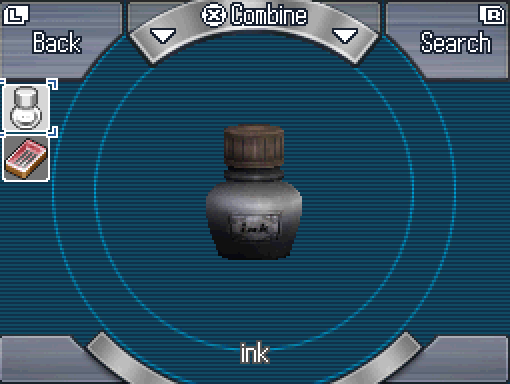
Ink []

A plain bottle of black ink.
A bottle of black ink that is found by opening the drawer on the right side of the dresser in the communications office.
Combines with cylinder to form: dirty cylinder
Paper []

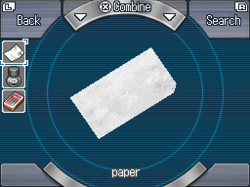
A sheet of unmarked white paper.
A blank sheet of white paper found by opening the drawer on the far left side of the dresser in the communications office.
Combines with dirty cylinder to form: Morse code chart
Unique Key []

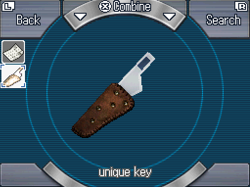
This is one weird looking key...
A ceramic key with a leather covering found in the middle drawer of the dresser in the communications office. Used to turn on the keypad in the Captain's Quarters.
Uranus Key Card[]
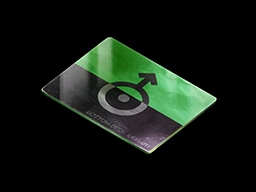

The Uranus key card.
A green and black keycard found inside of the ALL-ICE file. Located in the middle drawer of the dresser in the communications office. Later used to access the Library behind Door 9. The words "Bottom Deck Library" are written on the corner.
Information About ALICE[]
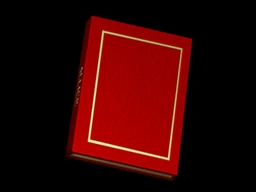
Unreadable information on All-Ice.
A red book written completely in hieroglyphics, which neither Junpei nor Ace can understand. The Uranus key card is found inside of it. Written on the key is a sentence that says "Bottom Deck: Library". The file itself is found inside the middle drawer of the dresser in the communications office.
File screen
The Numerical System Chart[]
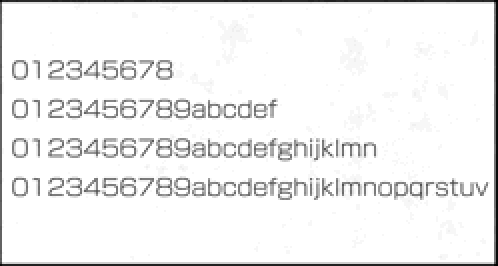

A chart of different systems of numbers.
A sheet of paper with two systems of numbers on it (Nonary and Hexadecimal). It is a hint to what numbers Junpei has to type in on the keypad. It is found in the drawer underneath the "ZERO" monitors, which is located in the Captain's Quarters.
File screen
Combined Items[]
Cylinder []

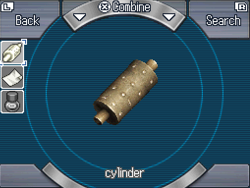
A bronze cylinder with tiny ridges on its surface.
Created from: music box + small screwdrivers
A bronze cylinder found within the music box after unscrewing it. There are ridges (pins and lines), likely hiding a morse code message.
Combines with ink to form: dirty cylinder
Dirty Cylinder []

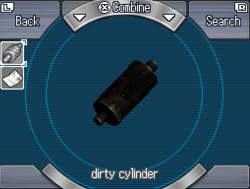
The cylinder covered with black ink.
The bronze cylinder soaked by black ink.
Combines with paper to form: Morse code chart
Morse Code Chart []
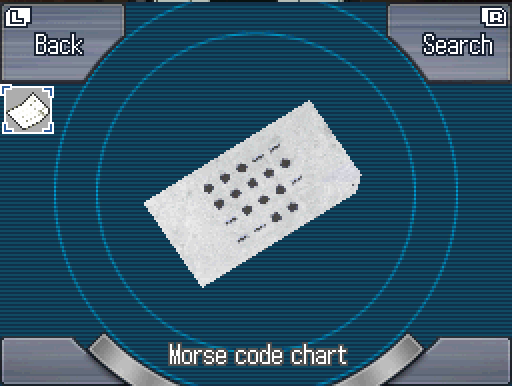

The result of rolling the dirty cylinder on a sheet of blank paper.
Created from: paper + dirty cylinder
After rolling the dirty cylinder on the paper, it reveals a morse code message. Junpei types the message on the telegraph, which proceeds to open the middle drawer on the dresser that contains the Allice file.
Minigames[]
Telegraph[]
The end result of the Morse code puzzle.
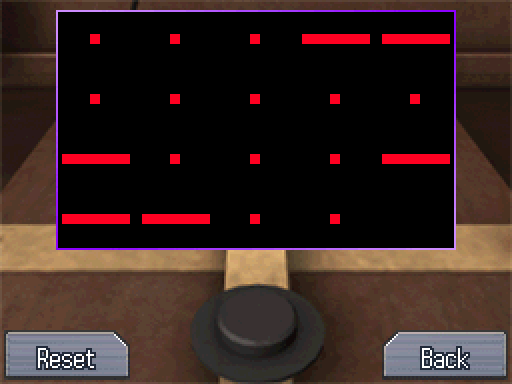
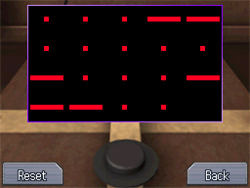
Requirements: Morse code chart
This is a really simple puzzle. In Morse Code, a dot means a short tap, and a dash means you hold the button down for a few seconds. Simply do what the Morse code chart says, and you unlock the drawer that was previously locked. This drawer holds the Uranus key and the "Information about Alice" file.
Door Lock[]
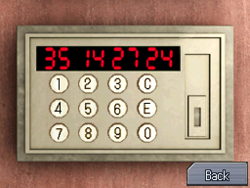
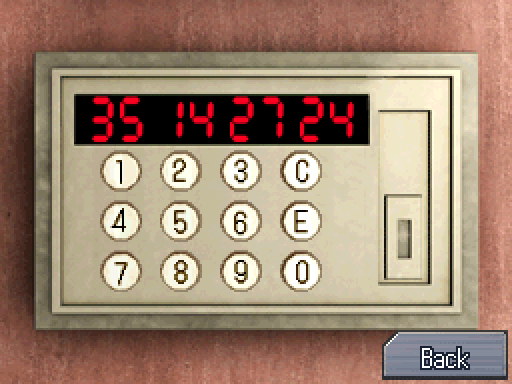
The password to open the door.
Requirements: unique key
To solve this "puzzle", examine the keypad and insert the unique key. 8 lines show up, meaning you have to type in a 8-digit password. Using hexadecimal numbers (A=10, B=11 C=12, etc...), figure out which four numbers correspond to the letters "Z", "E", "R" and "O". The password is 35-14-27-24. Successfully unlocking the door will allow you to escape the room and go back to the central staircase.
Trivia[]
- Another version of the "Morse Code" puzzle is played in the Study.
- The morse code translates to "35=Z". This likely serves as a hint as for how to solve the Captain's Quarters door (with first 2 digits being 35, translating into Z).
- In the DS version, after triggering the 'z e r o' display on the True Ending route, when Clover starts to tell Junpei about the morphogenetic field and such, there is a typo. "So... what exacty did they have you guys do?"
| SPOILER WARNING - DON'T READ UNTIL YOU COMPLETE TRUE ENDING | |
| |
Humorous Quotes[]
- Examine the camera after adjusting the TV display:
- It looks like whatever the camera sees...
...Shows up on the screens behind us.
Yeah, so if I put my hand here, in front of it...
...It shows up on the middle top screen back there... Clover: You've got a short life line, Junpei... Junpei: Hey! Mind your own business! - The camera's pointing at the exit.
- It looks like whatever the camera sees...
- Examine wall hooks in the communications office:
- Ace: Look, a hook. Junpei: ... Ace: Th-That wasn't a joke! Junpei: I know man...
- It's a hook. For hanging clothes, I think.
- Examine chair in the communications office:
- Ace: A chair.
- Ace: It's a chair...
- Ace: If I sit in it, will you let me be chairman? Junpei: No. Ace: Aww...
- It's a chair. Nothing exciting going on there.
- Examine the bottom left machine with cylinders, when seeing the Morse instrument close-up:
- Junpei: Hey, Ace, look! It's a model of a steam train! Ace: How on Earth did you arrive at that conclusion?
- To be honest, I have no goddamn idea what this thing really is.
It's probably some kind of radio transmitter... - It's probably part of some kind of radio transmitter.
- Examine the top left machine, when seeing the Morse instrument close-up:
- Junpei: Hey, Ace, look! It's a monkey with glasses! Ace: How on Earth did you arrive at that conclusion?
- It also kinda looks like someone who's been watching too much TV...
To be honest, I have no goddamn idea what this thing really is.
It's probably some kind of radio transmitter... - It's probably part of some kind of radio transmitter.
- Examine the telegraph key main body, when seeing the Morse code input close-up:
- Junpei: Hey Ace, look! There's a big-ass rat trap over here! Ace: I told you, that's a telegraph key! Ace: It is a device that transmits messages through Morse code.
- A telegraph key. There's no cheese on it, unfortunately.
- A telegraph key.
- After opening the ALLICE file (the following excerpt appears no matter the story path, however, the overall dialogue it fits in can change):
- Each page was covered with strange characters.
They looked like tiny drawings of birds, snakes, insects, horned animals, wings, and even kneeling humans. There were many pages in the file, and each was full of these strange symbols. Junpei: What the hell is this...
He didn't realize he'd spoken out loud until Ace looked over at him. Ace: They are hieroglyphs. A form of writing used in ancient Egypt. Junpei: ...Ancient Egypt? Ace: That's right. Junpei: Can you read them? Ace: Of course... Ace: ...I can't. What would make you think I could? Junpei: What the hell...
- Each page was covered with strange characters.
- Examine the empty drawer where the ink was, after picking the ink:
- There's nothing in the drawer anymore.
- Ace: There's nothing in the drawer. Junpei: Nuh-uh. There's air. Ace: How old are you?! 9?!