- "Well, now we have these 2 rooms. I'm sure there's something in there that will help us get out of here. Let's find it."
- — Lotus, upon finding the doors unlocked
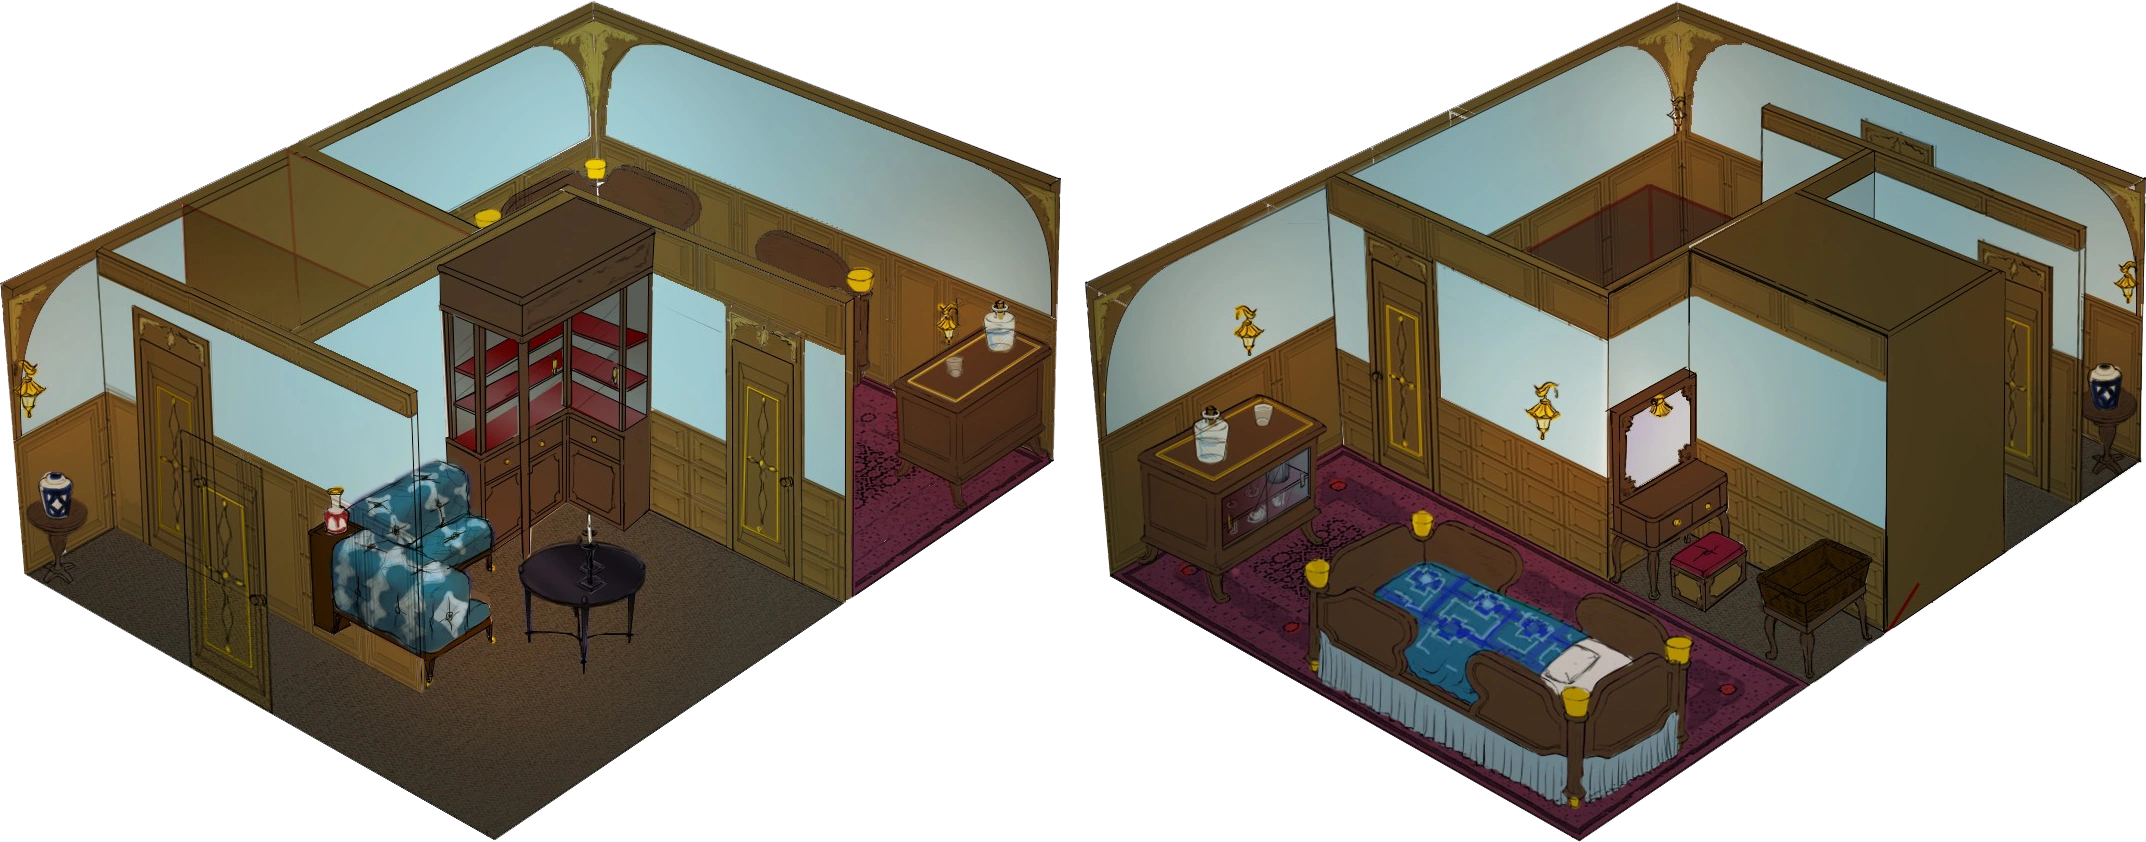
The 2nd class cabin is the escape room found by entering Door 4. It actually consists of two fairly well-furnished twin cabins on either side of the same corridor: rooms B92 and B93. Junpei, Santa, June and Lotus enter them in order to find a way to open the door with the Mars lock. They initially split up into two groups. Junpei and June search room B92 while Santa and Lotus search room B93. Junpei serves as a "bridge" between the two teams. After the 2nd class cabin is the kitchen.
Layout
Concept art for room B92.
The 2nd class cabin is composed of two mirrored cabins, rooms B92 and B93.
Near the entrance of each cabin is a short corridor going side to side. On one side of the corridor in a little corner is a vase on a stand, a strange picture, and a door leading to a small bathroom, which sports a shower and a toilet. Following the other side of the corridor leads into a small, living room style open area, furnished with a corner couch, a small round table and a display case. The living room also features a door leading into a bedroom containing a small cupboard, a two person bed with a tall frame, a painting, and a vanity with matching chair.
Notable differences between rooms B92 and B93 include: the display case in room B92 is empty, while that in room B93 contains multiple vases and plates; the painting in room B93 is missing three of its four pieces; the shower curtain in room B93 is missing; the lights in the bedroom in room B93 are out.
Story
Other than the important plot points listed below, the most notable character interactions are June's almost constant flirting with Junpei, along with his interest and more moderate flirting towards her, as well as Santa and Lotus's frequent bickering, mostly related to Santa's unwise comments about Lotus's age.
Confronting a Childhood Friend
Junpei reacts to June's suspicion with a question of his own...
...which June deflects by playing with his heart.
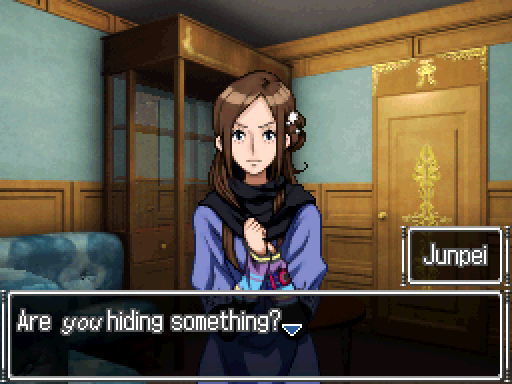
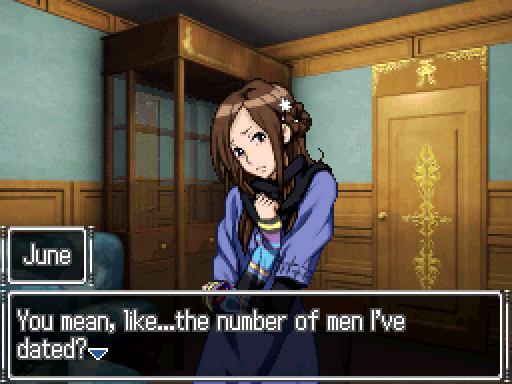
Triggered by picking up the matches in room B92.
Picking up the matches reminds Junpei of the fever attack June had when the 9th Man's body had been discovered, so he asks her how she's feeling, and is reassured to find out she feels and looks much better now.
But though June is touched by his worry, she's also interested in the mystery of why Zero would have chosen two childhood friends who hadn't seen each other since elementary school to participate in his "game". She therefore asks Junpei if he's hiding anything from her, to which he retorts that of course he isn't, before firing the same question back at her. She first evades the question by skillfully using his obvious feelings for her to tease him, but then answers that neither is she hiding anything from him.
June then reminds Junpei of Seven's words from before:
- "Look for what connects the victims. That will lead you to the culprit."
This causes the two of them to start wondering if this game is related to someone from their former school, like a classmate, a teacher, or the principal, though admittedly, neither of them can recall anyone that would be suspect. Junpei then tries to think of anything weird that occurred during elementary school.
The Curse of the Egyptian Mummy
Triggered when picking up the B Deck map in the bedroom of room B92.
Seeing the map of the ship will cause June to recall some of Zero's words when he addressed the players on the central staircase:
- "On April 14th, 1912... The famous ocean liner Titanic crashed into an iceberg."
- — Zero, addressing the players via speaker
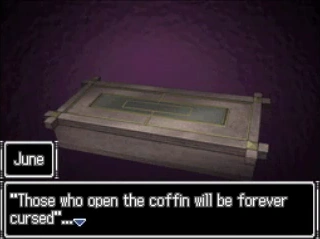

The curse of Priestess Amon-Ra.
This causes her to wonder if there is some relation between the Titanic and the boat they find themselves in. The conversation can then have slight variations depending on Junpei's choices by him either suggesting the boat they are in is a replica of the Titanic, which will lead June to ask him if he believes in curses, or suggesting they may be inside the actual Titanic, in which Junpei suggests that the Olympic and the Titanic were switched and that the Olympic was supposedly dismantled in 1947.
The conversation eventually leads into a discussion in which June casually mentions that the Titanic was sunk by a curse, but it inevitably leads to June telling him the story of of the curse of the mummy of Priestess Amon-Ra, which she believes was responsible for sinking the Titanic. Junpei has a hard time believing June is even being serious, but she tells him the strange story of the mummy: besides the curse, which caused all who opened her coffin to suffer mysterious deaths, the mummy was also known for being extremely beautiful, being as perfectly conserved as if alive. This was apparently due to all the the water in her body being frozen, although with a kind of ice that wouldn't melt even in the desert.
Clover Words

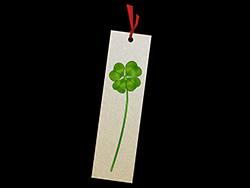
A bookmark with a drawn clover.
Triggered by picking up the plate in the display case in room B93.
After picking up the plate in the display case, Santa will ask Junpei if he has a minute to talk: Santa has found a bookmark inscribed with a drawn clover and he wants Junpei to hold on to it. Junpei retorts that Santa should keep it himself if he thinks it's important, to which Santa answers:
- "You know what I hate most in the world?
I got 4 things:
Hope, Faith, Love, and Luck."- — Santa, on why he won't keep the bookmark
The four things he hates are the leaf words, each represented by a petal of the clover. There are then three ways in which this conversation can go:
- Junpei refuses to take the bookmark
Should Junpei refuse to take the bookmark (which requires answering "no" twice), he will suggest that maybe Santa should try giving the bookmark to Lotus. Santa agrees:
"Hey, you old bag!
I just found the perfect thing for a woman in her 40s!"
Just as Junpei went back to work, he heard bones breaking. He pretends he didn't hear the sound and scrambles back to search the room.
- Junpei accepts the bookmark
Should Junpei accept the bookmark, Santa will thank him, and explain, once asked, that he hates the four leaf words because they all can betray you, adding that he dislikes the number 4 since "cause it's a half-ass number. Not the best or the worst". Just as Junpei is trying to make sense of this confusing explanation, Santa will ask him if "he plays?". Junpei asks:- whether he's talking about gambling
If Junpei correctly interprets the question as being about gambling, Santa will talk about baccarat, and Lotus will soon join in, mentioning its rules reminder her of the digital roots used in the Nonary Game, and then proceed to explain number prefixes: uni (1), bi (2), tri (3), quart (4), quinti (5), sext (6), septim (7), octo (8), nona (9), hence explaining the meaning of "nonary". - whether he's talking about the stock market
If Junpei incorrectly guesses he means "playing the stock market", Santa will be surprised at his interpretation, but will also offhandedly comment that indeed he has played in the stock market before, and actually won a small fortune by investing in Cradle Pharmaceutical a few years back. Junpei says that he had never heard of that company, but more than that, he is rather surprised, as he didn't expect something like that from Santa. However, further questions are cut short by Lotus, who insists they get back to work.
- whether he's talking about gambling
Sheldrake on the Morphogenetic Field
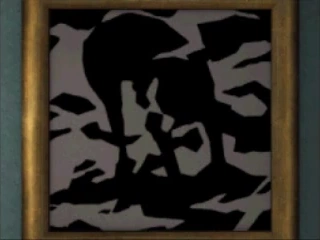

A brain-sucking monster, according to June...

...but really just a harmless dog.
Triggered by picking up the Mars key.
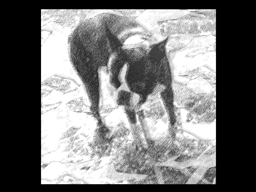
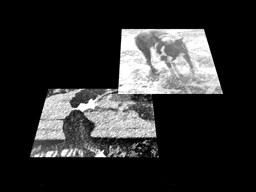
Upon picking up the Mars key, Junpei will replace the picture that was hiding it, and wonder aloud what the picture is about. Lotus then reveals she saw this picture before on a book by Sheldrake on the morphogenetic field, which she roughly describes as a hypothesis proposing a mechanism for telepathy.
Santa laughs at anyone attempting a serious study of such a thing and makes a joke about kids in the 1970s, but though Lotus seems to agree with him, she nonetheless finds herself interested in the topic. She then asks Junpei what the picture looks like to him, a question to which he can answer in multiple ways (many of them amusing, specifically the Funyarinpa), though inevitably, it is revealed that the picture is actually a dog.
At this point, Lotus tells them that pictures similar to this one (i.e. pictures that are hard to identify at first, but almost impossible to see as anything else once the solution is known) were once the subject of an experiment:


- Two such pictures, of a lady wearing a hat and of a dog, were initially shown to 1,000 people outside Britain to measure the success rate at identifying them correctly.
- The dog picture was then broadcast in Britain along with the solution to an estimated audience of 200,000 people.
- The first test was then repeated, again outside Britain, and though the success rate for the lady picture hardly changed, the success rate for the dog picture was doubled.
The morphogenetic field, an invisible field allowing humans to communicate information to one another, was Sheldrake's proposed explanation for the strange result. Lotus admits that the results of the experiment could have been easily falsified and was sure that all of it was pseudoscience. However, as Lotus and Santa walked away from the picture, all Junpei could think about was the morphogenetic field.
Items
Found items
Matches 

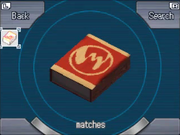
Matches! Now to find something to set on fire!
This box of matches is found on the table in Room B92, and picking it up triggers a conversation between Junpei and June. It can be used to light the candlestick found in Room B93.
Combines with candle to form: lit candle
Dresser key

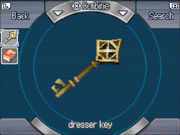
A key with an elaborate handle.
This fancy key is found in the dresser in the bedroom of room B92. It looks just as if it might be the key for the very drawer it was in, which would make it useless, but is actually used to open the drawer in the twin dresser found in room B93.
Candle

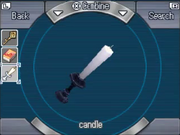
It's a candle!!!
A candlestick on a holder found on top of the living room table in room B93. Junpei can light it using the matches to obtain the lit candle in order to explore the bedroom in B93, where the lights are out.
Combines with matches to form: lit candle
Curtain
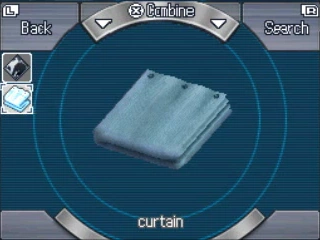

A shower curtain.
This is the shower curtain that is initially missing from the bathroom in room [B93], and can be found on top of the bed in the bedroom of that cabin while it is being illuminated by the lit candle.
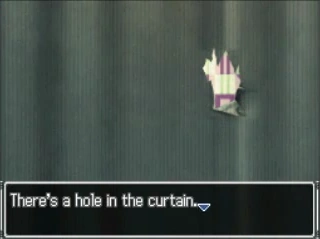

A peeping hole?
Its most noticeable feature is the rather large hole that can be seen once it has been hung, and which directly faces a tile in the shower wall: the 5th from the top and 3rd from the right. This is a clue on how to obtain one of the plates, which is hidden behind the corresponding tile in cabin B92.
Candlestick key

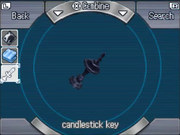
An unexpected key.
After Junpei picks up the curtain and moves away from the bed it was on, the light provided by the lit candle will go out. Examining the stump will reveal that the candlestick burned out, revealing that the candle holder is actually a key. This key is used to open the display case in cabin B93 in order to obtain a plate.
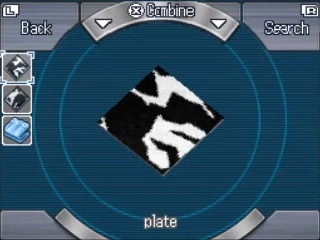
Plate

A piece of the picture puzzle.
One of the missing pieces from the picture in room B93, found in the drawer of the vanity in room B93. Obtaining it requires the dresser key to open the drawer (also, actually entering the bedroom in cabin B93 requires having obtained the lit candle to illuminate it, although the dresser can be opened even after the candle burns out).
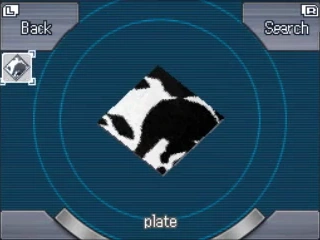
Plate

A piece of the picture puzzle.
One of the missing pieces from the picture in room B93, found in the display case in room B93, which can be unlocked using the candlestick key.
Plate
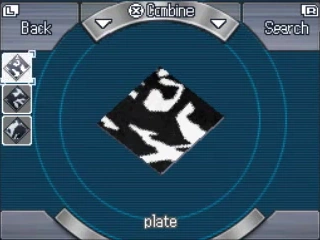

A piece of the picture puzzle.
One of the missing pieces from the picture in room B93, found behind the tile placed 5th from the top and 3rd from the right in the shower of cabin B92, as was hinted at by the curtain.
Mars key
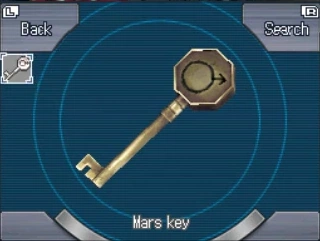

A key engraved with the Mars symbol.
This is the prize obtained by reassembling the picture in cabin B93, being found in a hidden indentation behind it. It is the item that the party was searching the 2nd class cabin for in order to move on. Junpei then uses it to open the Mars door.
Unusual for a planet key, the Mars key is added to Junpei's inventory.
Clover bookmark

A bookmark with a drawn clover.
This special, one of a kind item can by obtained by choosing the right answers (i.e., not rejecting it) in the clover words story section. It is essential for achieving the True Ending, as it is necessary to give the bookmark to Clover in the Operating Room to do so.
Being a story item, the bookmark is not added to Junpei's inventory, being instead automatically brought up in the relevant story moment if the player is following the right path.
Combined items
Lit candle

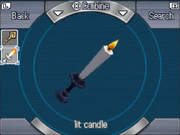
It's a lit candle!!!
Created from: matches + candle
The obvious result of combining the candle with the matches, and required to explore the darkened bedroom in cabin [B93]. As it gets rather warm while lit, Junpei decides to place it down on the vanity. Once burnt out, he can examine the stump to find out that the candle holder is actually a key.
Minigames
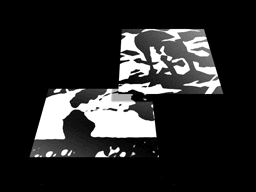
Picture

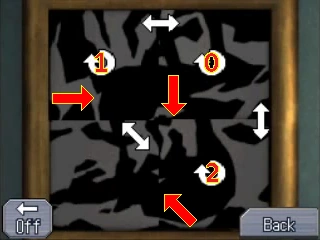
The solution. Red numbers indicate how many times to rotate a plate, and red arrows where to move them.
Final image.
Requirements: Plate, Plate, Plate
After collecting the 3 missing plates from the picture in cabin B93, Junpei needs to place them correctly to match the dual picture in cabin B92. The game is played by touching the straight white arrows to swap plates and the curved arrows to rotate them. This minigame can also be solved using trial and error.
Successfully solving this minigame will allow the party to obtain the Mars key and trigger the Sheldrake on the Morphogenetic Field story scene.
Trivia
- In the iOS version, Santa and Lotus find the Mars Key without Junpei's help.
Humorous quotes
- Examine the picture in room B92:
- June: This is kind of a weird-looking picture. Do you think it's an abstract painting or something? June: It looks kind of like...a demon...with an elephant-like nose... June: ...Sucking on a human being's brain...
Where the hell did that come from?
What's her brain made of...
Can't say I'd mind finding out a little more about what goes on in there... - It's a kinda weird-looking picture. It's some sort of weird black and white design.
Looks like there's a room [on the right side of this picture]. - An odd-looking picture with black and white pattern. Looks like there's a room on [the right side of the picture]...
- Examine the sofa in room B92:
- Junpei: Ahhh. June: Jumpy, what are you doing?! June: We don't have the time to be relaxing on a sofa!
- It's a sofa.
Maybe I shouldn't sit on it. June'll get mad again... - A sofa.
- A mi-re-do.
Oh no...my mistake. It's a so-fa. - A sofa. The color is a soothing light blue.
- Examine the light in the bedroom in room B92:
- June: It's light. Junpei: Even if it's heavy? June: That's light!
- It's a light. Thanks to it, we can see.
- Examine the water bottle in the bedroom in room B92:
- June: It's a bottle with water in it. June: This is a bedroom... June: They probably have it here 'cause your throat always feels dry when you wake up, you know? Junpei: My throat's dry, but I think that's 'cause I'm a little nervous right now. June: Well, we did run a lot, so we're kinda sweaty. June: Hey Jumpy, did you want to take a shower together? Junpei: Whoa! June: *Giggle* Just kidding.
Too late to take it back... My brain's already working out the picture.
My throat was dry already... This sure isn't helping. - It's a bottle with some water in it. I doubt it'll be that useful.
- Examine the bed blankets in the bedroom in room B92:
- It's a light blue blanket with some designs on it.
Someone's made the bed, or at least never un-made it.
There's only bedsheets under the blanket. Nothing exciting. - A blanket.
- Junpei: Should we take another look at this blanket? June: No, I think we've covered it pretty well.
Looks like that one was lame enough to get her to blush a little. - A blanket.
It's so well made that it for sure won't fly off.
- It's a light blue blanket with some designs on it.
- Examine the pillows in the bed in room B92:
- Junpei: Look, there's 2 pillows right next to each other. Junpei: Guess it's a double... Junpei: Huh? What's up? You're turning red...
Oh man... Is her fever back? Junpei: Hey, are you all right? Junpei: Do you need to lay down for a minute? June: I-I'm fine! June: I think it's still a little early for that... Junpei: Huh...? Junpei: Hey, seriously...are you really okay? - There are 2 pillows next to each other.
- Examine the frame of the bed in room B92:
- June: A bed frame. June: Now we don't have to worry about falling off. June: I...toss and turn when I sleep...
She's blushing again... What the hell is she thinking about? - A bed frame.
- Examine the soap holder in the bathroom in room B92:
- There's a little blue platform protruding from the shower wall next to the knobs. It's for putting soap on. I used a shower once, so I know.
- A soap holder.
- Search matches while in room B92:
- June: It's a box of matches. There are matches inside, obviously.
- Junpei: Hey, do you think we could burn down that door at the end of the hallway with these matches? June: ... June: ... Junpei: Not gonna work, huh... June: Yeah...
- They're matches. I could probably light something small on fire with them.
- Search matches while in room B93:
- Lotus: They're matches. Lotus: They won't be enough to set fire to anything very big. Junpei: How about that door at the end of the hallway? Lotus: No. Are you an idiot? Santa: Well, maybe there's a way... Santa: We might be able to use Junpei's clothes to build a bigger fire... Junpei: U-Um... No.
- They're matches. I could probably light something small on fire with them.
- Examine the light in the bedroom of room B93 while the lights are out:
- Junpei: Is that a light? Kinda hard to tell in the dark... Hmm, I wonder if this is what they call "irony"... Lotus: To figure out if this is a light... we need a light. Lotus: Talk about a Catch-22. Lotus: Kind of says something about life, though, don't you think? Junpei: ...
- There's something in here that looks like a light, but it's too dark to tell.
- Examine the mirror in the bedroom of room B93, with the lights off:
- Lotus: This is the mirror for the dresser. Santa: Damn straight. Nothin' weird about it, though.
- Lotus: Mirror, mirror, on the wall, who's the fairest of them all? Lotus: "That would of course be Lotus." Lotus: Ohohohoho! Santa: Crazy old bat... Santa: Guess the stress was just too much for her... Lotus: Did you say something!? Santa: Nope, nothing...
- The mirror on the dresser. It doesn't respond when I talk to it. Very rude for a mirror.
- The mirror on the dresser. There's nothing suspicious about it.
- Search lit candle while in room B92:
- June: Jumpy, you lit the candle. Junpei: Yeah. You want me to light your heart on fire? June: ... Junpei: ... June: Jumpy... Don't quit your day job, okay?
- A lit candle. Should give us some light.
- Examine the bed on room B93 while the candle is lit, but having already taken the curtain:
- Anything under the blanket...? Nope. Nothing suspicious here.
- Anything under the blanket...?
A girl with burning red eyes stares back at me. Junpei: Gah!
Ah, I'm just messin' with ya. There's nothing there. - Anything under the blanket...?
Nope, still nothing suspicious. No ghosts, or girls either.
- Examine the shower head in the bathroom in room B93:
- Santa: Whoa, look! Junpei! There's a mushroom growing out of the wall! Junpei: Um...that's a shower head...
- A shower head. It's dry, and it doesn't look like it's been used in a while.
- Search the shower curtain while in room B93:
- Santa: A curtain, huh. Santa: Well, it's got all these metal rings, probably so you could hang it from something, you know? Lotus: Yes, but it doesn't look like a normal curtain. Lotus: The way it feels... I think it's probably waterproof. Lotus: Which would make this a shower curtain. Junpei: A shower curtain, huh...
- Santa: It's a folded-up shower curtain. Santa: Damn, that thing's big, if you open it up. Lotus: Oh, there's a hole... Like a bug ate through it, or something. Santa: Oh you're right. Think maybe it was a peeping tom?
I'll bet Lotus would sure make the perv hurt. Lotus: If I catch him, you won't hear a peep out of the jerk--I'll knock him into tom-morrow. Santa: That's tom much. - It's a shower curtain.
The jury's still out on whether or not it was the work of a pervert, but there's a hole in it. - It's a shower curtain. There's a hole in it.
- Examine the shower curtain in room B93, once reinstalled and closed:
- Santa: Wow... That's a pretty obvious peephole. Santa: Somebody's really dedicated. Junpei: Well, with a hole this big, you gotta wonder if maybe they wanted to be caught. Santa: So, you're saying maybe the one getting spied on was into that shit? Junpei: Maybe they were into, like, those home invasion fantasies... Santa: "Home invasion"? Interesting... I see... Lotus: You 2 are real idiots, you know that? Santa: ... Junpei: ...
- Examine the shower curtain hole after retrieving the bathroom tile:
- Sadly, there are no hot women on the other side of the hole.
As such, there's no point to looking through it... So I won't.
- Sadly, there are no hot women on the other side of the hole.
- If answering "funyarinpa" when Lotus asks whether the picture looks like anything:
- Junpei: A funyarinpa? Junpei: See...? I mean this totally looks like one... Here, and here...
Junpei indicated parts of the picture that looked exactly like the other parts.
After 3 seconds of silence, Lotus looked at Junpei. Lotus: What the hell is a funyarinpa? Junpei: What do you mean "what the hell is a funyarinpa"? You mean...you don't know?! Lotus: How the hell would I know!? Junpei: How could you not know?! Junpei: That's...that's practically blasphemous. Junpei: Say you're sorry! Apologize to the funyarinpa! Goodness, you are such a rude woman.
Another 3 seconds of awkward silence went by. Lotus opened her mouth as she shook. Lotus: Junpei, are you just screwing around? Junpei: ... Lotus: Forget it. I'm just gonna tell you. Lotus: This is a dog. Lotus: See...like this.
Lotus pointed out parts of the picture, and eventually a dog took shape in them.
It looked as though she had a point.
It was a dog.
Santa also nodded in agreement.
- Refuse to take the bookmark:
- Junpei: Yeah, I don't want it. Junpei: Why don't you give it to Lotus? Santa: Ahh. Good idea. Will do.
Santa turned and headed off to the other room. Santa: Hey, you old bag! Santa: I just found the perfect thing for a woman in her 40s!
He walked into the next room, waving the bookmark...
Junpei turned back to his work...
...And heard a faint sound from the other room... The sound of bones breaking. Junpei: ... Junpei: I'm just gonna pretend I didn't hear that...
- Talking about gambling:
- Santa: In baccarat, the best possible hand totals 9. They call it "Le Grande". Santa: But the lowest, most worthless cards, the 0s, they call "monkey". Junpei: Just like the guy in charge of this game, huh? Junpei: Zero's a monkey...
Santa blinked, utterly stunned.
Then he began to laugh. Santa: Ahahahahahahahahaha! Ha...! Oh man, you're totally right! Santa: The guy who trapped us in here sure is one hell of a monkey...
- Examine the mirror in the bedroom of room B92:
- June: This is the mirror for the dresser.
...And now she's playing with her hair. Does she even realize she's doing that? Junpei: Hey. We don't have time for that. Junpei: C'mon, it's not like there's anyone here you need to impress. June: Yes there is. Junpei: Who...? June: ... Junpei: What? Why are you so quiet all of a sudden? June: Ugh! Forget it, Jumpy! - A well-polished mirror.